.net
【.net】リソースを使用しexeにファイル埋込&使用方法
今日はリソースを使い、exeにファイルを埋め込む/使用する方法メモです。
僕自身、よくExcelの雛形やXMLの設定ファイルを埋め込んだり、読み込んだりします。
「Excelの雛形をexeに埋め込み、出力する時にそこから使用する」というサンプルを作ります。
事前準備とVisualStudioの設定
まずexeに埋め込むための、空のExcelファイル(以下Book1.xlsxとする)を作成しておきます。
ここからはVisualStudioでの設定です。
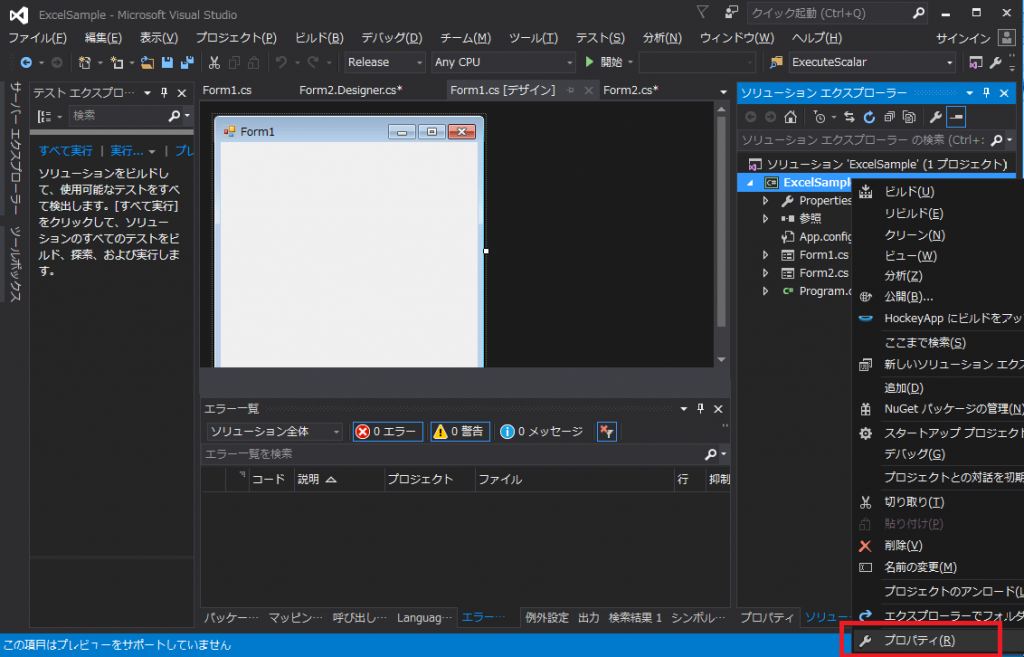
プロジェクトを右クリックしてプロジェクトのプロパティを表示します。
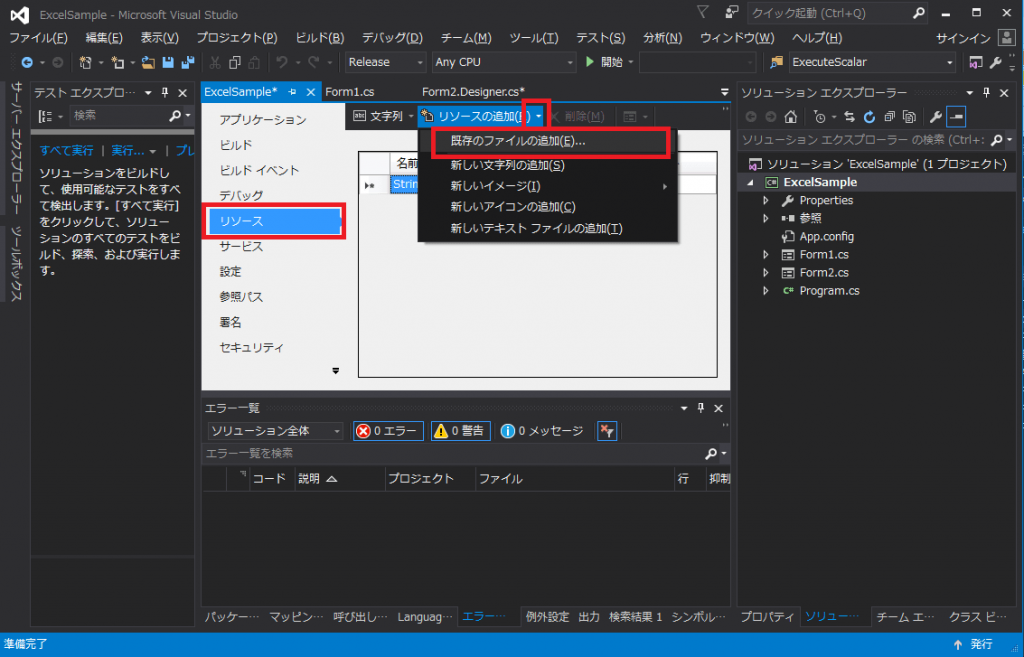
「リソース」を選択し、「リソースの追加」の右の▼ ⇒ 「既存のファイルの追加」をクリックします。
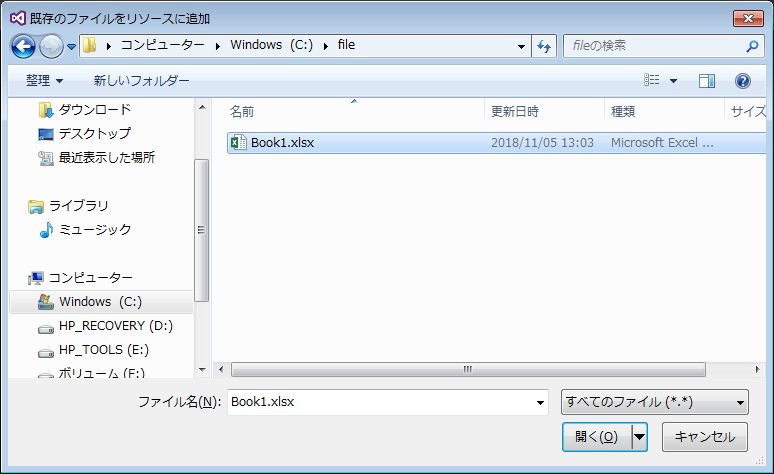
あらかじめ用意しておいた「Book1.xlsx」を選択します。
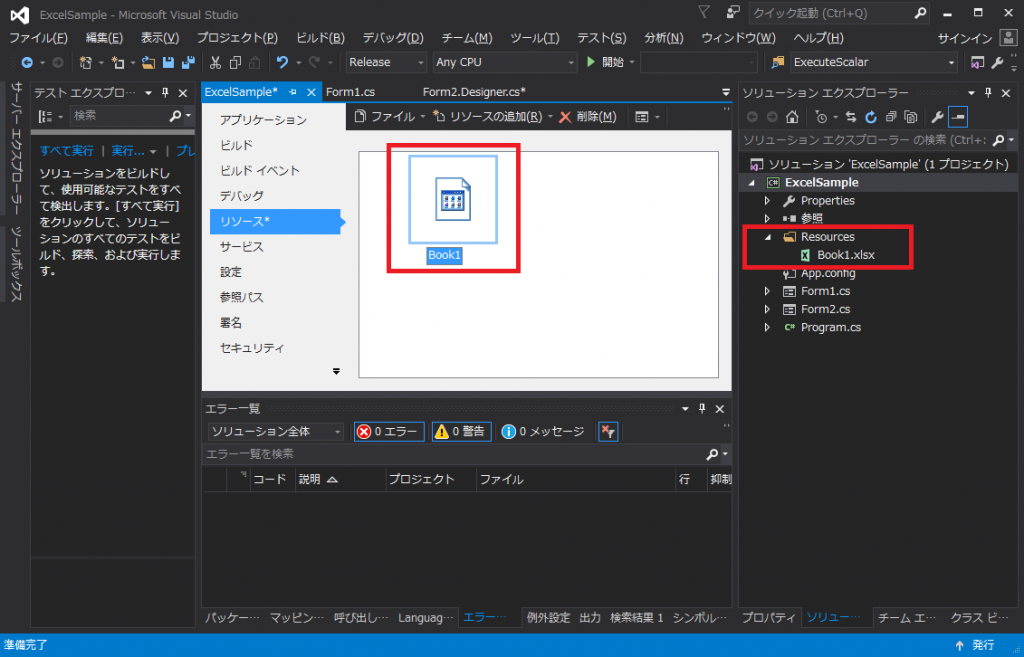
「Book1.xlsx」がリソースに追加されます。
デフォルトでは↓のように プロジェクト\Resources に格納されます。
サンプルソース
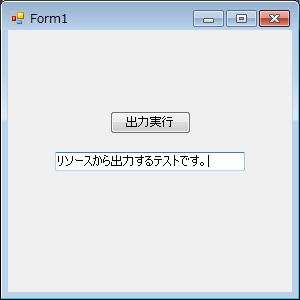
リソースに追加したBook1.xlsxを読み込み、Textboxに入力した値を書き込む簡単なサンプルです。
using System;
using System.IO;
using System.Threading.Tasks;
using System.Runtime.InteropServices;
using System.Windows.Forms;

namespace ExcelSample
{
    public partial class Form1 : Form
    {
        public Form1()
        {
            InitializeComponent();
        }

        async private void button1_Click(object sender, EventArgs e)
        {
            await Task.Run(() => Export(textBox1.Text));
        }

        private void Export(string output)
        {
            dynamic xlApp = null;
            dynamic xlWbooks = null;
            dynamic xlWbook = null;
            dynamic xlSheets = null;
            dynamic xlSheet = null;
            dynamic xlRange = null;
            try
            {
                Type objectClassType = Type.GetTypeFromProgID("Excel.Application");
                xlApp = Activator.CreateInstance(objectClassType);
                xlWbooks = xlApp.Workbooks;

                // リソースから出力先へファイルをコピーする
                string outputPath = @"C:\file\Book1_dest.xlsx";
                File.WriteAllBytes(outputPath, (byte[])Properties.Resources.Book1);

                // あとは通常通り、開いて出力
                xlWbook = xlWbooks.Open(outputPath);
                xlSheets = xlWbook.Worksheets;
                xlSheet = xlSheets.Item("Sheet1");

                try
                {
                    xlRange = xlSheet.Range("A1");
                    xlRange.Value = output;
                }
                finally
                {
                    Marshal.ReleaseComObject(xlRange);
                }
                xlWbook.Save();
            }
            finally
            {
                if (xlWbook != null)
                {
                    xlWbook.Saved = true;
                }
                //COMオブジェクトの開放
                Marshal.ReleaseComObject(xlSheet);
                Marshal.ReleaseComObject(xlSheets);
                Marshal.ReleaseComObject(xlWbook);
                Marshal.ReleaseComObject(xlWbooks);
                //Excelアプリケーション終了
                xlApp.Quit();
                Marshal.ReleaseComObject(xlApp);
            }
        }

    }
}
要点は↓でリソースからファイルをバイトで取得するところです。
(byte[])Properties.Resources.Book1
では実行してみます。
ポチッとな。
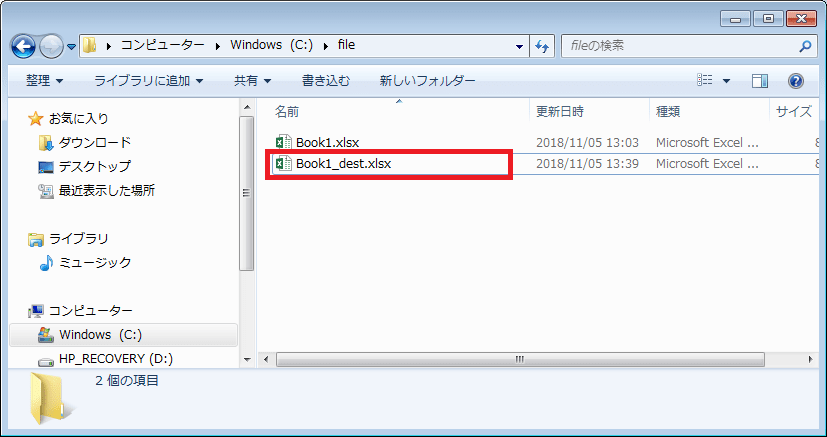
すると、↓にちゃんと「Book1_dest.xlsx」が作成されています。
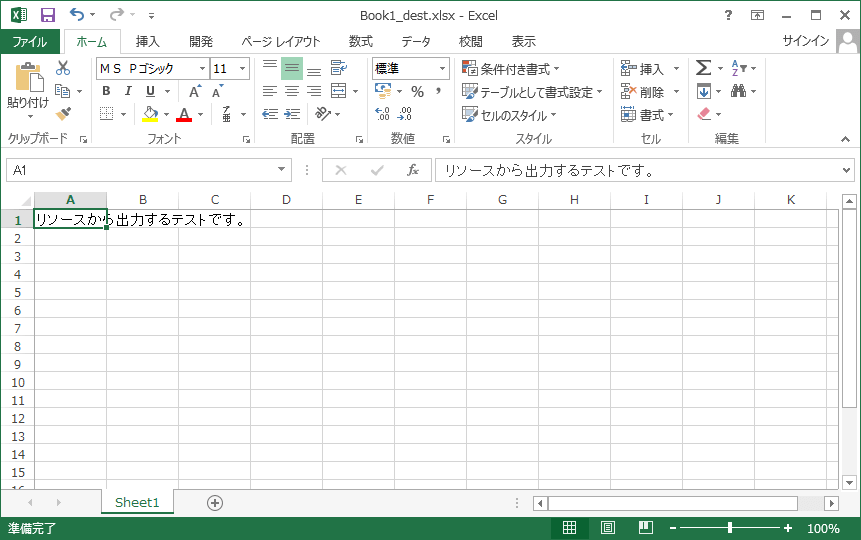
中身も反映されていました。
めでたしめでたし。
